Page 219 of 221
Re: Build a dedicated Audio PC
Posted: Thu Mar 05, 2015 7:07 pm
by Sligolad
Good to hear the second clock install worked well Nige, I do not think I will attempt that mod before Scalford but maybe after then.
Are you going to pop the Choke for Memory and bypass as well?
If you get a chance will you post a pic of the signal wire from the OCXO going to the USB board, might be worth trying on the V4 PPA USB card.
I have 2 more H97M-D3H boards on the way at the moment so hope to get stuck into them soon.
I found the standard Intel CPU heat sink without the fan connected works great without getting too warm on an Intel Core i7 4770S, 1150, Haswell, set at 800Mhz.
Cheers, Pearse.
Re: Build a dedicated Audio PC
Posted: Thu Mar 05, 2015 10:09 pm
by nige2000
Re: Build a dedicated Audio PC
Posted: Thu Mar 05, 2015 10:17 pm
by nige2000
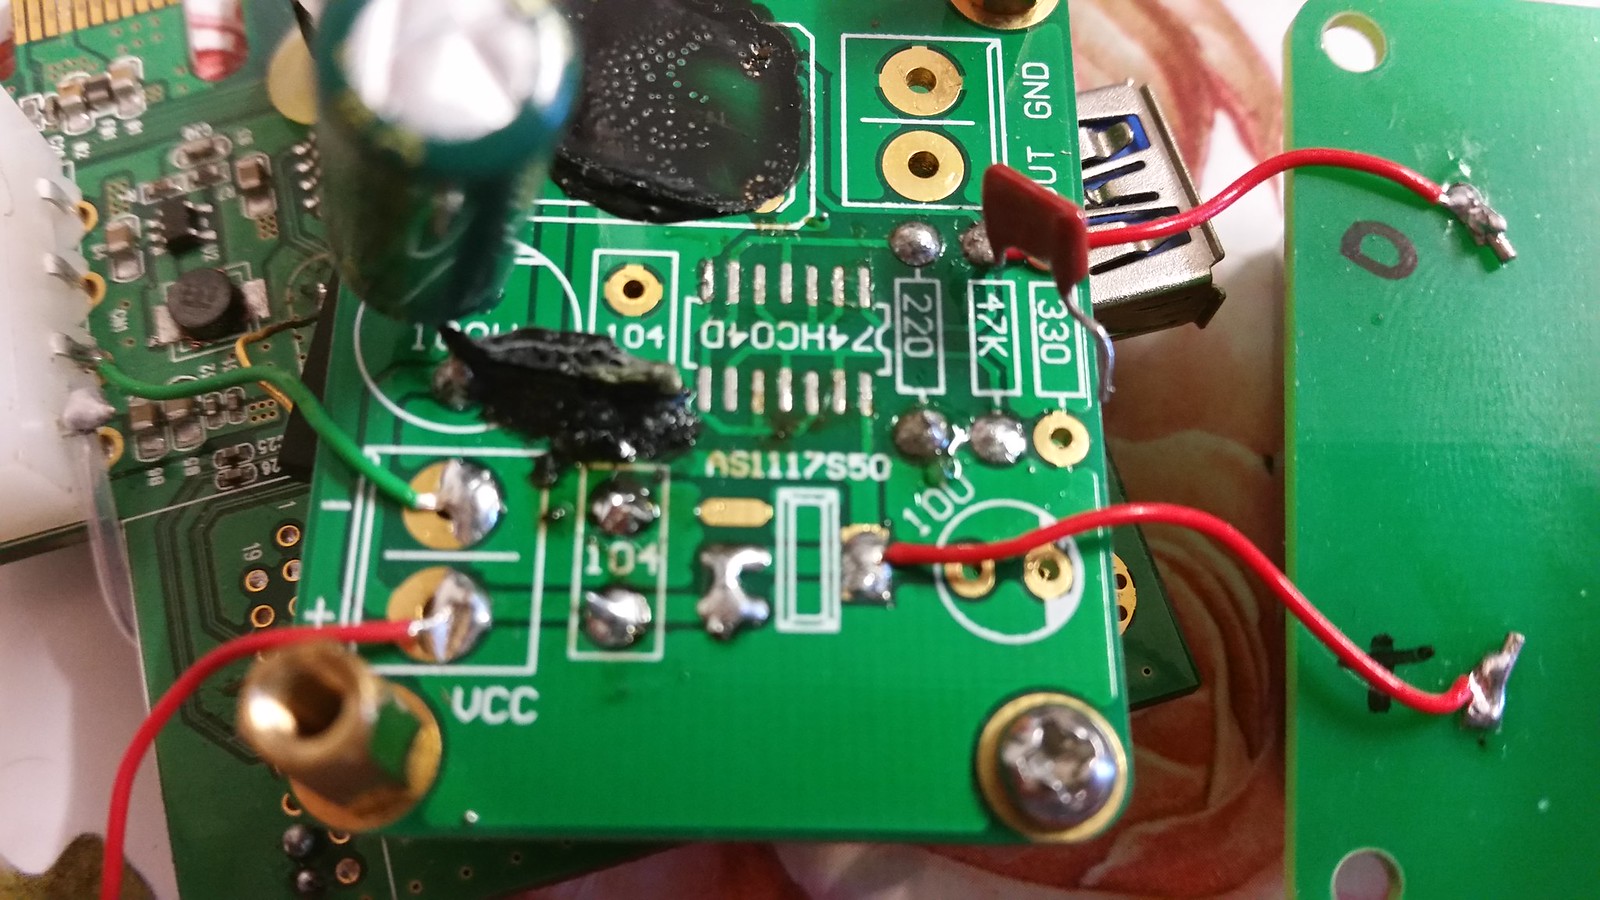
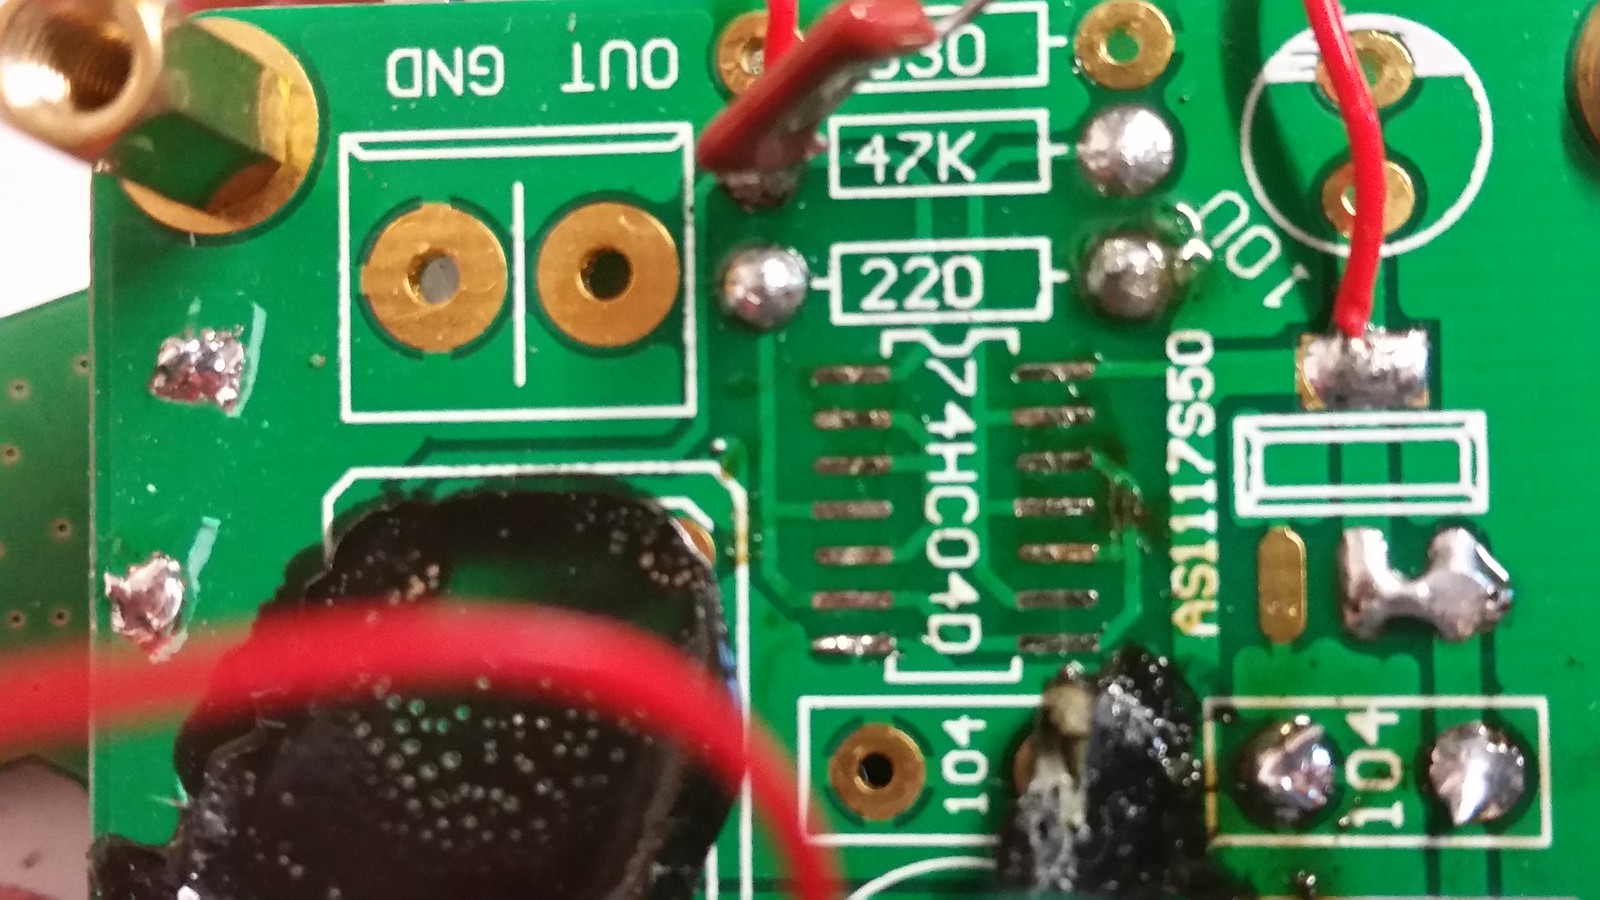
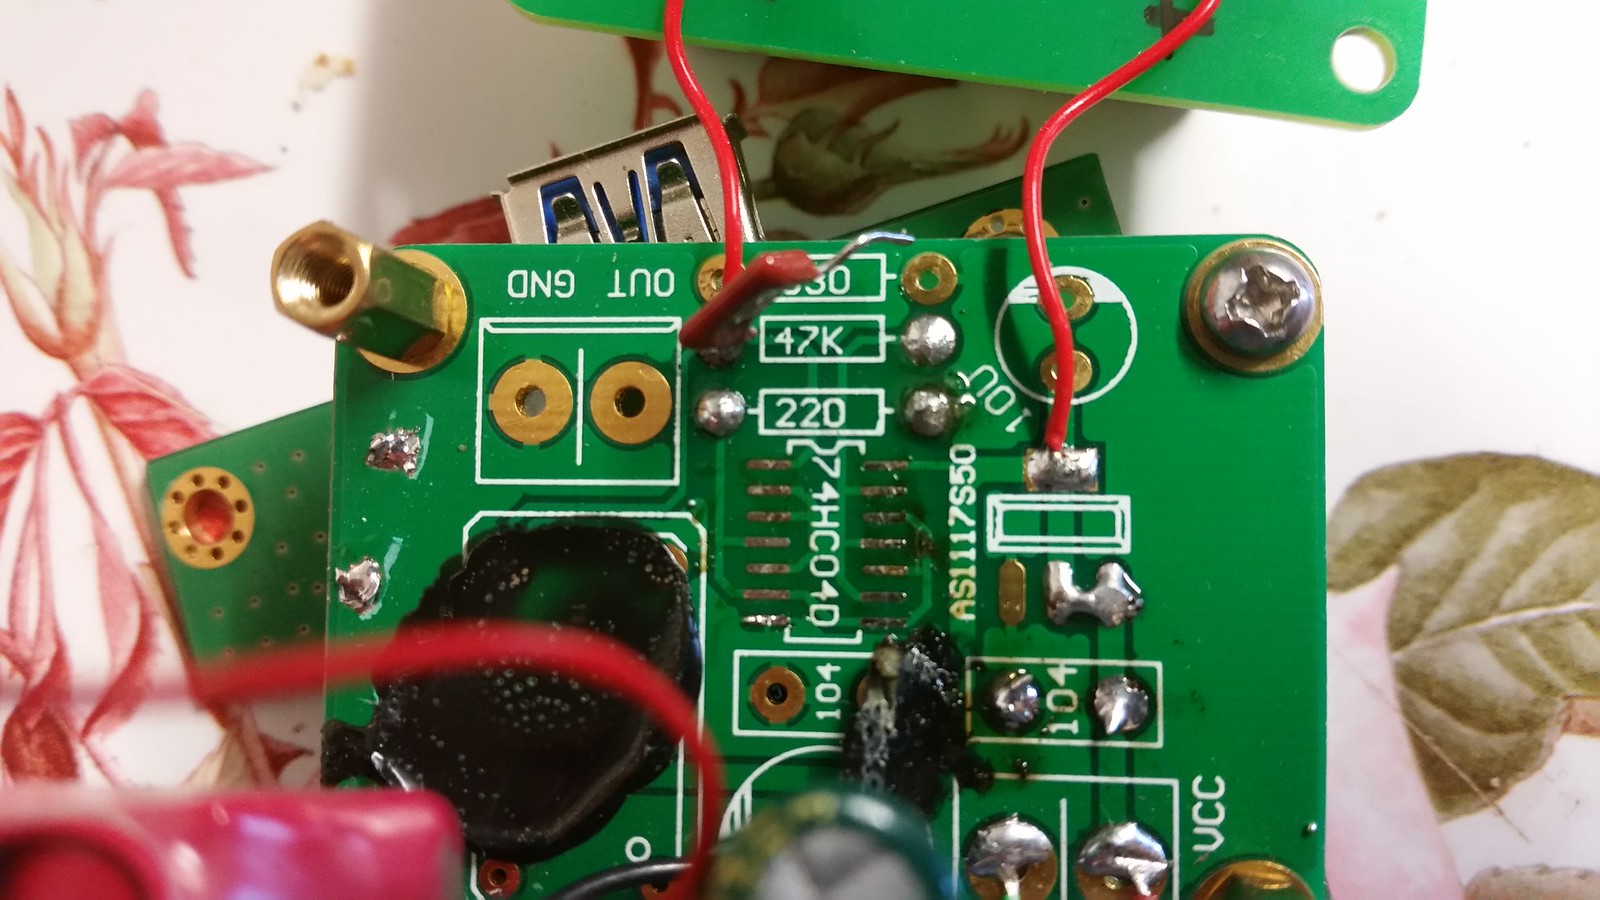
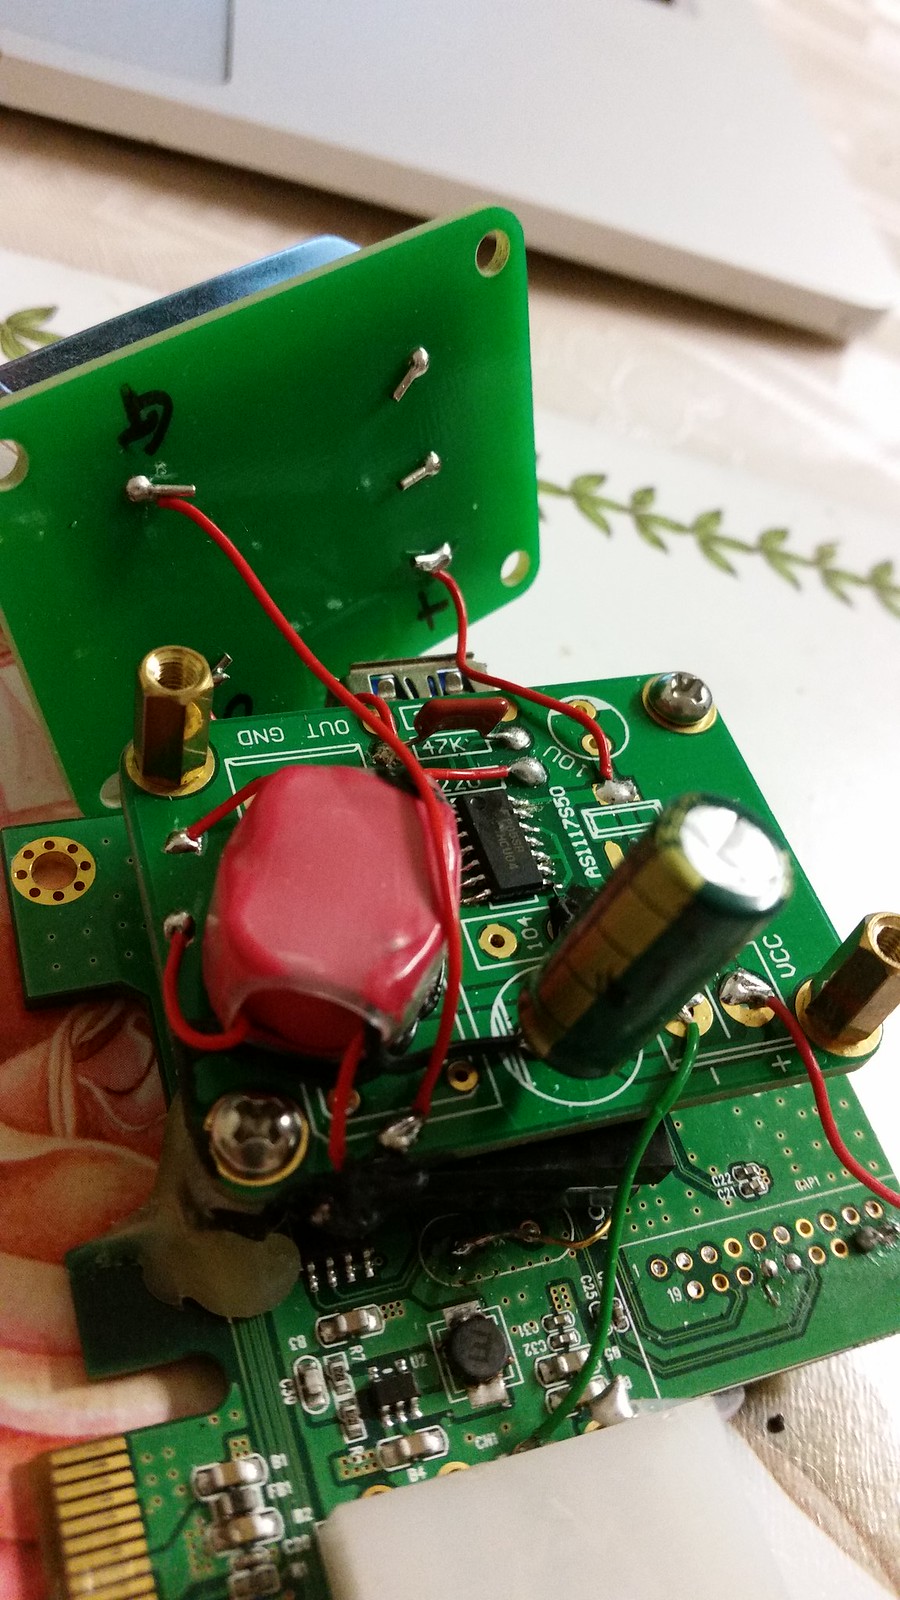
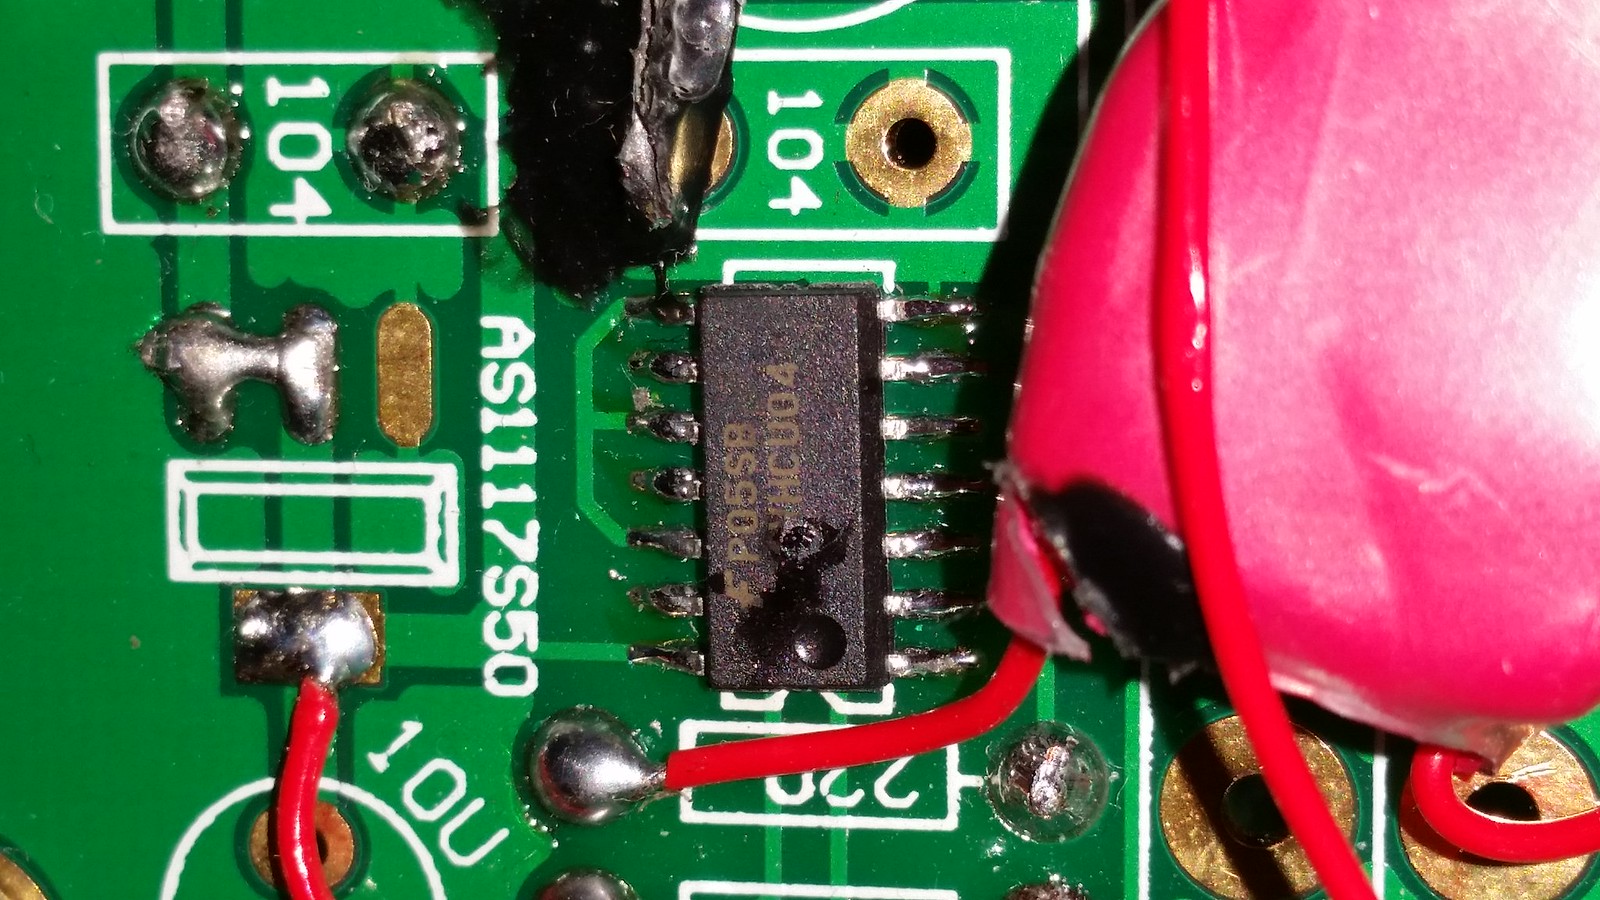
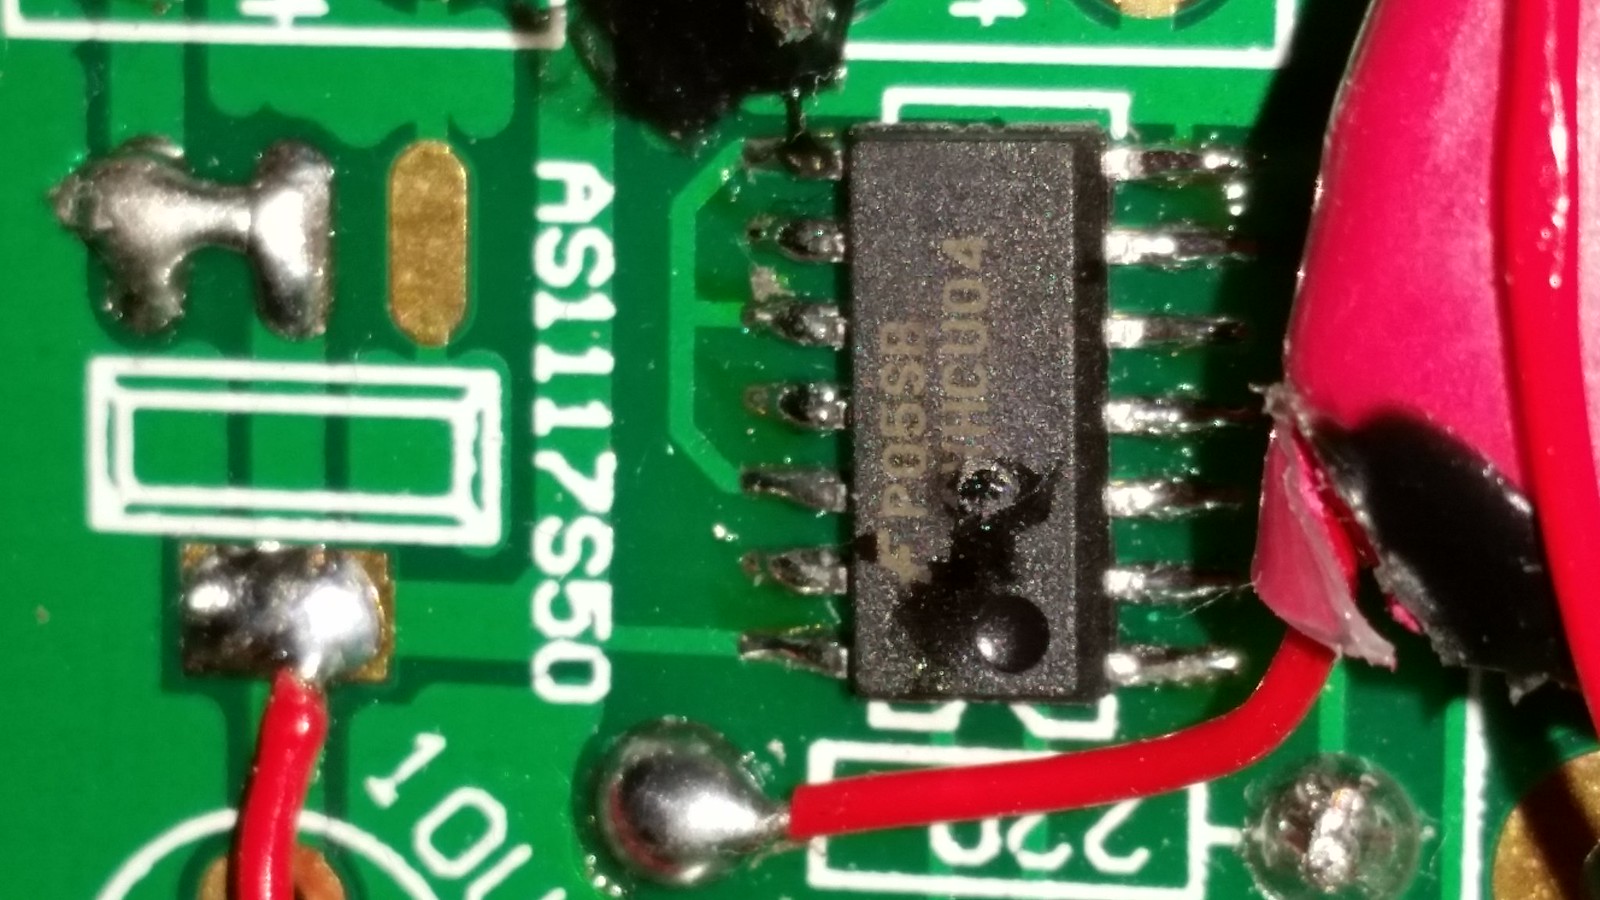
ok there a little big
counldnt be bothered fixing the size
anyway
no brain surgery here
under the ocxo is labeled G, O and +
which is sort of self explanatory
disconnect O from the circuit board and wire direct into clk input on usb card
disconnect + from circuit board and wire direct into ocxo +
so that its not powered at all
important to have these clocks warmed up before a-b testing
Re: Build a dedicated Audio PC
Posted: Fri Mar 06, 2015 12:25 am
by Sligolad
Thanks Nige,
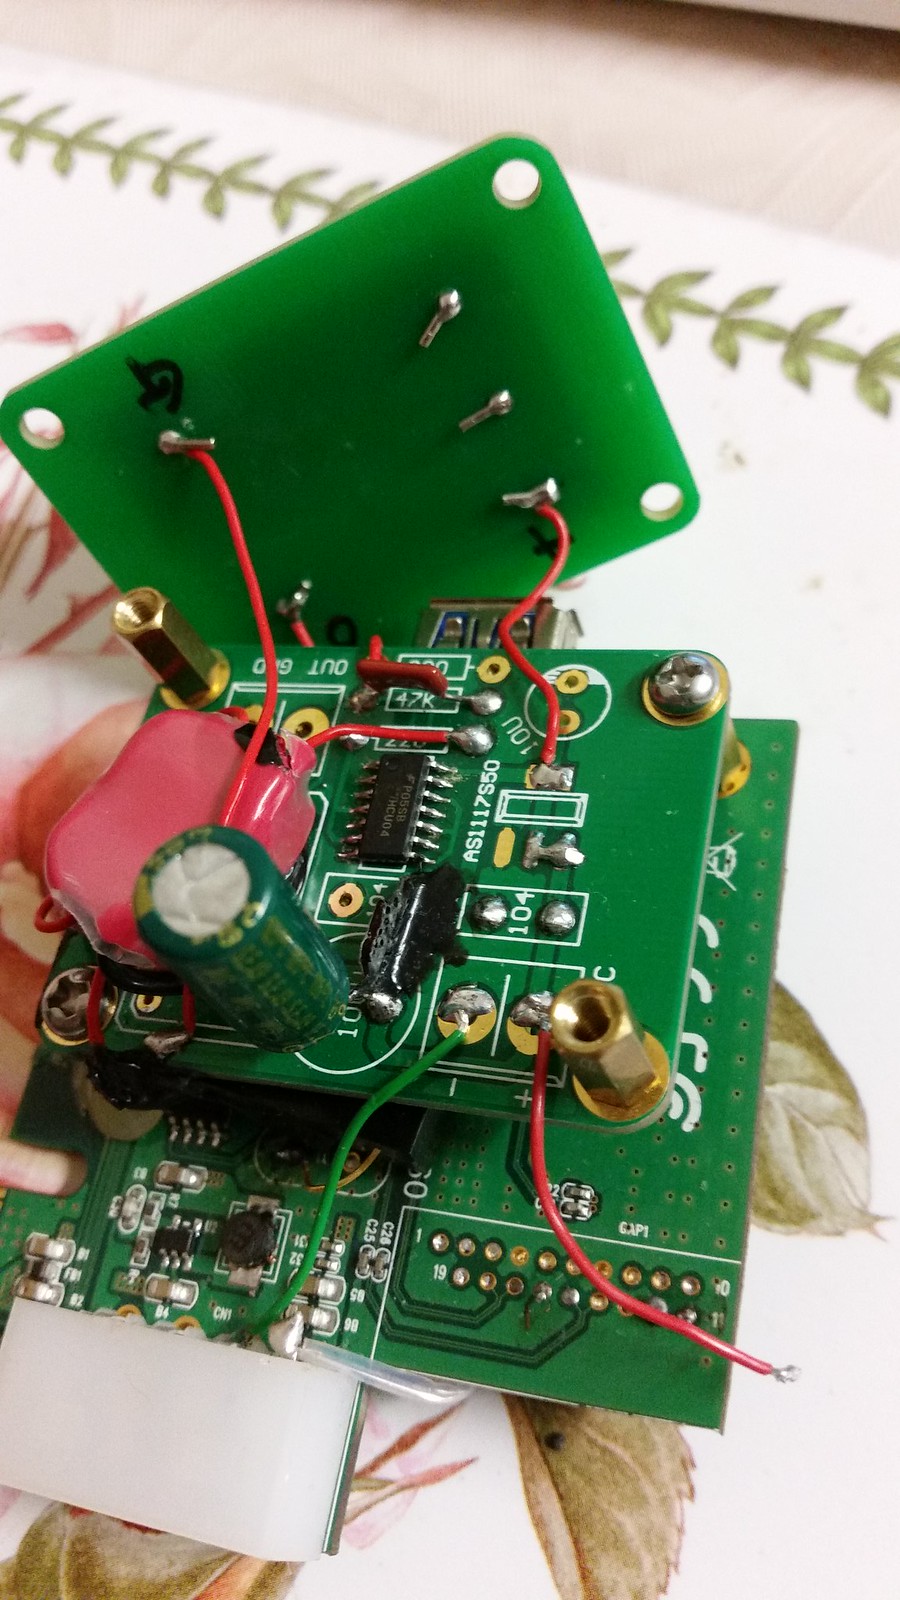
Can I assume you basically stripped out that intermediate board altogether which is still connected in the pictures and also connected the green ground wire to G on the clock pcb?
Cheers, Pearse.
Re: Build a dedicated Audio PC
Posted: Fri Mar 06, 2015 12:40 am
by nige2000
yea just bypass the middle board
you can leave gnd wires as is as its still connected
just take power + off the middle board and connect to + on ocxo
i had all this on the scope the signal seemed to become distorted going through the inverter and resistors but strangely sq wise it was the transformer and cap that was causing the smoothing effect
Re: Build a dedicated Audio PC
Posted: Fri Mar 06, 2015 2:11 pm
by cvrle59
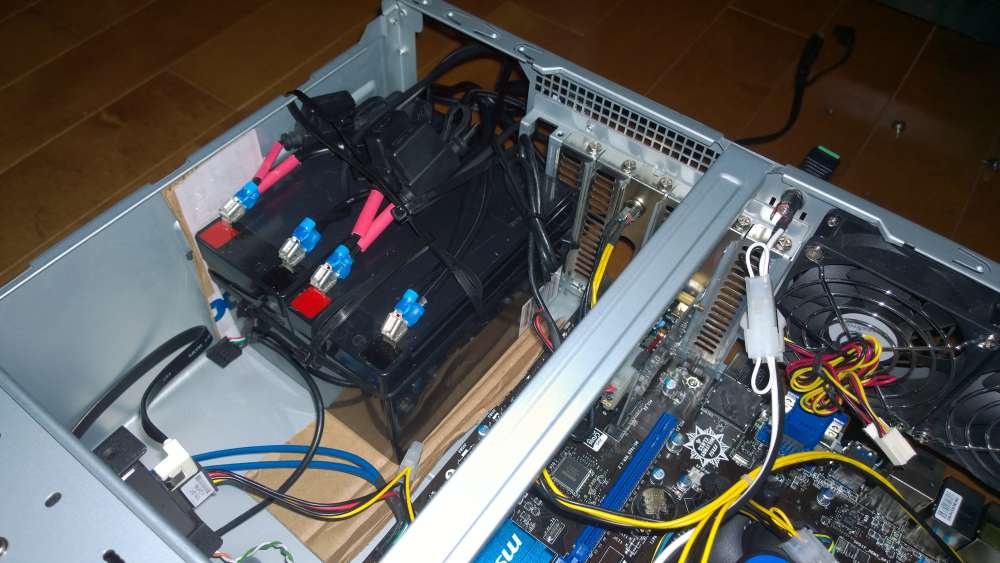
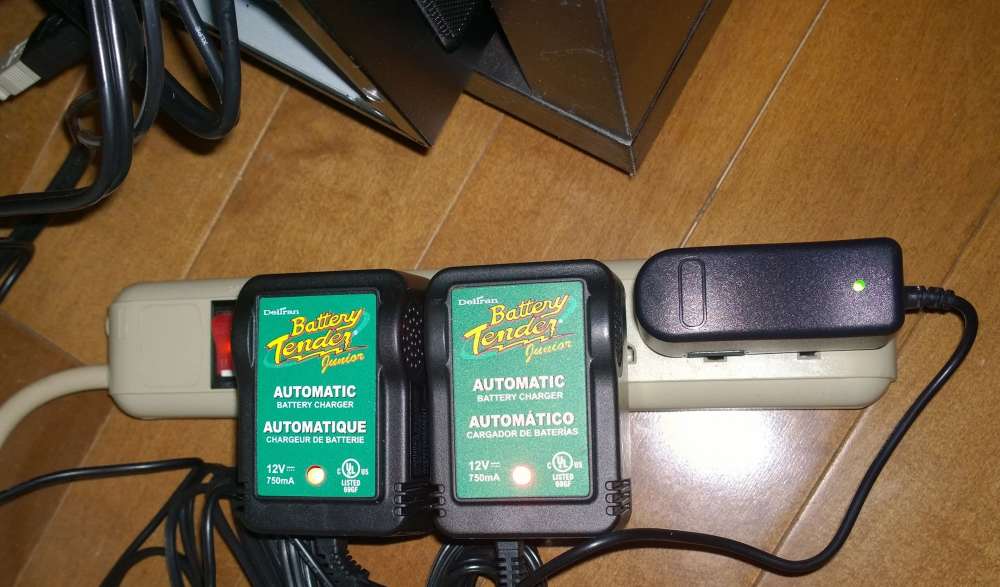
It is time to put some pictures of my new audio PC. I wasn't happy with the size of the box, it looked huge to me with a few items in, but at the end it worked well. I could place two 12V batteries in, so the boss is happy too. I was already asked two times if those will be on the floor all the time during testing mission. One photo shows my charging station, which I turn off during listening, otherwise it turns on.
Very happy so far!
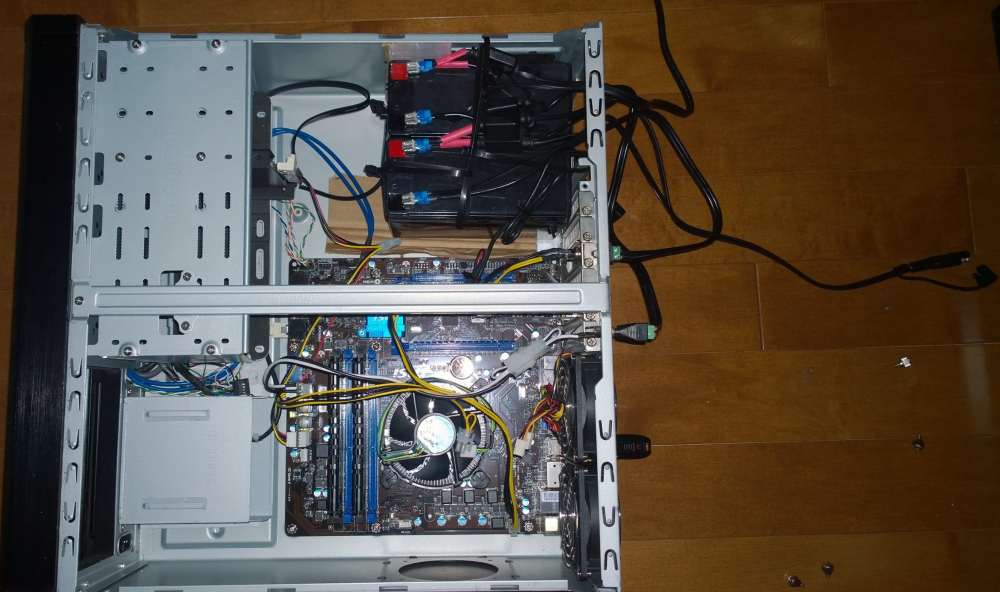
- WP_20150305_17_42_15_Raw.JPG (104.86 KiB) Viewed 1673 times
- WP_20150305_17_42_25_Raw.JPG (113.12 KiB) Viewed 1673 times
- WP_20150305_18_27_59_Raw.JPG (107.36 KiB) Viewed 1673 times
Re: Build a dedicated Audio PC
Posted: Fri Mar 06, 2015 6:30 pm
by Ken Moreland
Looking good , George, you know this is the start of the slippery slope. You could try disabling all the fans and leave the top off the case, works for me so no mechanical or electrical noise.
Re: Build a dedicated Audio PC
Posted: Fri Mar 06, 2015 6:51 pm
by cvrle59
Ken Moreland wrote:Looking good , George, you know this is the start of the slippery slope. You could try disabling all the fans and leave the top off the case, works for me so no mechanical or electrical noise.
None of the fans are plugged in...they are dead symbols of bad PC design...LOL
Re: Build a dedicated Audio PC
Posted: Fri Mar 06, 2015 7:37 pm
by nige2000
difficult to see but have you wired the 4pin cpu plug direct from battery?
is the linear supply not a runner?
Re: Build a dedicated Audio PC
Posted: Fri Mar 06, 2015 8:08 pm
by cvrle59
nige2000 wrote:difficult to see but have you wired the 4pin cpu plug direct from battery?
is the linear supply not a runner?
Yes I did...I should've done better job arranging those cables before I took the picture, to make it less confusing. The cable with 4pin molex, coming from pico is vacant, but the other one coming from the connector facing outside of the box is connected and supplied by one of two batteries.
The other thing, that is hard to see from photos (resolution had to be slashed down to be able to upload), is that those Tender Chargers come with 7.5A inline fuses. So, I did rearranged wiring little bit with adequate terminals, and I changed those fuses with 2A. There are 4 in total, if you pay attention, they are on top of the batteries. Each charging line has one, and each load feed line has one too.
The small charger on right side is used to charge Anker battery which feeds PP-USB card.
I played some DSD tunes by JPlay6 last night, amazing!